
- -10%


Reference: 131-36XSANP500
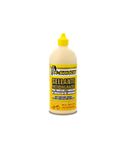
The new formula of the sealant liquid for use in tubeless mountain wheels X-Sauce Tubeless MTB has no ammonia and features an almost neutral ph. Ready to be inserted directly into the wheel, it now lasts longer in summer with heat and plugs larger holes, as well as being injectable with a needle. It comes in a 500 ml bottle.
 Lowest Price Guarantee
If you find it cheaper, we'll match the price.
 Minimum price guaranteed
If you find it cheaper, we will match the price.

Secure Site: our online store is protected by an SSL security certificate.

SSL security certificate.

Sitio Seguro: nuestra tienda online está protegida mediante certificado de seguridad SSL.

Shipping 24/72h Peninsula. Up to 10 days outside Spain.

Shipping 24/72h Peninsula. Up to 10 days outside Spain.

You can return your order within 14 days

You can return your order in 14 days
INSTRUCTIONS FOR INTRODUCING THE ANTI-PUNCTURE SEALANT X-SAUCE FOR MTB TUBELESS SYSTEM
First shake the jar until all the liquid is well mixed homogeneously.
The recommended amounts of sealant liquid for each type of wheel and thickness are:
MTB 26": 80-100ml I MTB 27.5": 90-110ml I MTB: 29": 100-110ml I FAT BIKE: 170-200ml
We have several options to apply the anti-puncture sealant to our tubeless wheels, depending mainly on the type of valve.
1st Option: it will be to supply the liquid directly to the wheel through the valve.
1.a In case of thick valve or schraeder, we will need a terraja plug for the correct extraction of the howitzer; the thick valve is always removable. Once the howitzer is removed, the valve will be hollow and ready to supply the anti-puncture sealant.
Inject the liquid directly from the bottle. Once the sealant is introduced, we will retrace our steps by adjusting the howitzer back to the valve, making sure that it is tight to avoid leaks of air and sealant liquid. Give air to your wheel.


1.b In case of thin valve or detachable loan, we must fit the clamp key and turn the howitzer until it is completely unscrewed, it will be time to remove it. Once the howitzer is removed, the valve will be hollow and ready to inject the sealant liquid.
Inject the liquid directly from the bottle. Once the sealant is introduced, we will reverse our steps by adjusting the howitzer back to the valve with the faucet, making sure that it is tight to avoid leaks of air and sealing liquid. Give air to your wheel.


1.c Another option in case of a thin or fast valve will be to supply the sealant by means of an injector/syringe.
In this case we will need an injector like the one in the image, composed of a syringe with a macaroon or thin rubber tube that adapts to the valve and that allows the liquid to be introduced into the wheel through the valve itself.
To introduce it it is necessary to first completely remove the pressure from the wheel and leave the howitzer open. We will insert the pressure macaroon into the valve and press the injector so that the liquid passes through the valve into our tubeless cover. Once the sealant is introduced, we will retrace our steps again closing the howitzer making sure that it is tightly closed to avoid leaks of air and sealant liquid. Give air to your wheel and check that your tubeless cover is well heeled on the rim to prevent air and liquid leaks. In case of noticing a bad heel with the consequent loss of air in your wheel, move it and turn it so that the sealing liquid that is inside the tubeless cover, is distributed throughout the interior, sealing all the losses of air that the wheel may suffer either by a bad heel.


2nd Option: Using removable ones, we can unblock the cover and apply the sealant directly inside the cover. Then we will reassemble the cover with the detachables on the rim and proceed to give air to the wheels, checking that the cover is perfectly heeled and there are no losses.


3rd Option: It will be to supply the liquid through a needle injector. To do this we must fill this with anti-puncture liquid and attach the needle to the injector. Then and without fear, we must prick the needle on our cover making sure that it crosses it.
Important: It is not necessary to lower the pressure of the wheel, but in this case it is vital to puncture the wheel with the injector needle while holding the plunger of the injector itself. Otherwise, as soon as the needle passes through the cover, the pressure inside the wheel will cause the plunger and the contents of the injector to be expelled to the outside with force. If you do not feel confident to perform this operation simultaneously you can take the pressure off the wheel before performing this step.
Once we have proceeded to the puncture in the cover, we will only have to tighten the injector to supply the sealant to the inside of our wheel. After the introduction of the sealant remove the needle and if you have removed the pressure proceed to give air again. Finally turn the wheel so that the sealant is well distributed inside, sealing all possible pores and joints.


Note: in case of tubeless system, once the sealing liquid is introduced and the wheel is inflated, turn it and move it so that it moves and covers the entire interior surface, sealing the pores and joints avoiding air losses. If you notice any sound of air loss, locate it and move the wheel to get the sealant liquid to that point.